I’ll never forget the first time I attempted to make veg samosa at home. It was my friend’s birthday party and I’d confidently announced I’d bring homemade samosas. The night before the party, I stood in my kitchen at 10 PM, surrounded by flour, potatoes and sheer panic. The YouTube video I was following made it look so easy! Three hours later, I had what looked like sad, triangular lumps that exploded in the oil. Yeah, not my finest moment.
Fast forward to now and I can whip up a batch of samosas in 30 minutes flat. The secret? I learned from my disasters and figured out what actually works! My neighbour, Mrs Gupta (who’s been making samosas for forty years) took pity on me after the birthday party incident and taught me her quick method. Now my samosas actually look like samosas; they don’t explode and people actually ask for the recipe!
So if you’re scared of making a veg samosa recipe at home, don’t be. I’m going to show you exactly how to make them the easy way, with all the shortcuts and tricks I wish someone had told me from the start!
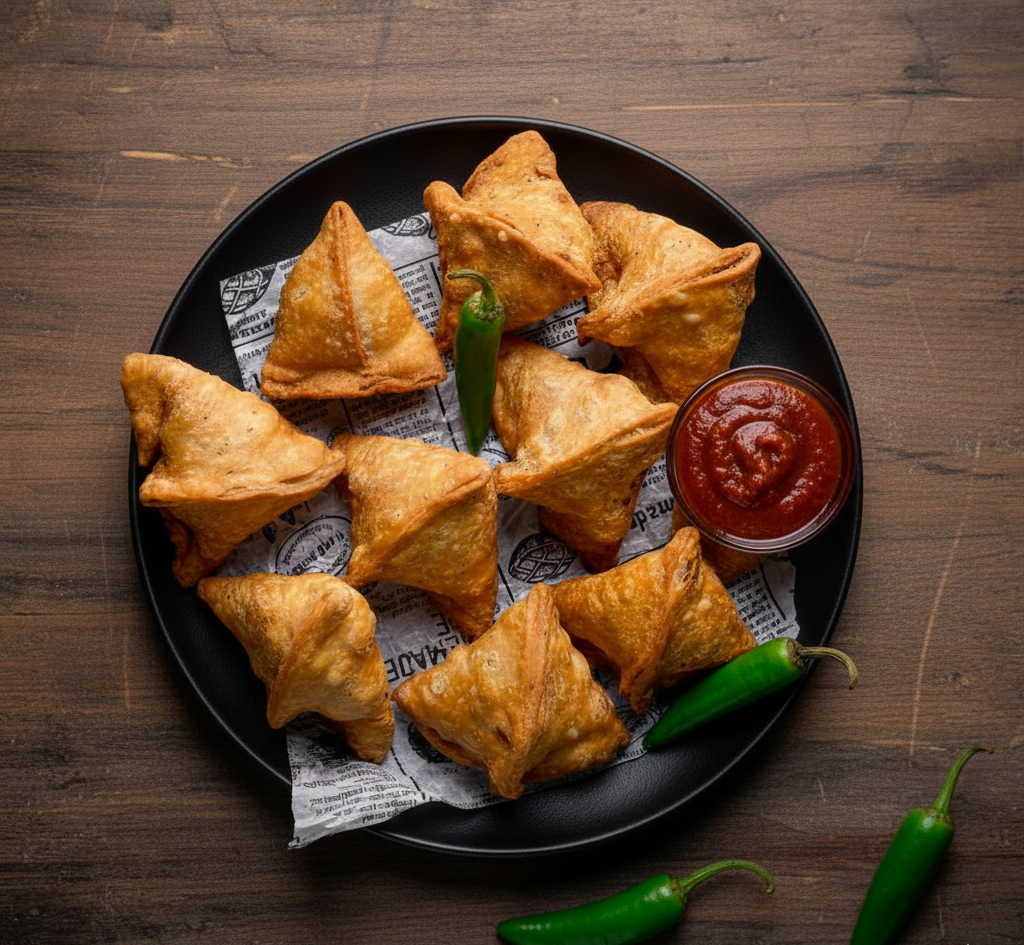
What do we need to make samosas?
The good news is that this recipe for veg samosa uses ingredients you probably already have! When Mrs Gupta showed me her ingredient list, I was relieved I didn’t need anything fancy.
For the dough:
- 2 cups all-purpose flour (plain flour works perfectly)
- 4 tablespoons oil or melted ghee
- 1 teaspoon carom seeds (ajwain) – optional but adds great flavour
- 1 teaspoon salt
- Water (about 1/2 cup, add gradually)
For the filling:
- 3 medium potatoes, boiled and mashed
- 1/2 cup green peas (frozen ones work great!)
- 1 teaspoon cumin seeds
- 1 teaspoon garam masala
- 1/2 teaspoon turmeric powder
- 1 teaspoon coriander powder
- Red chilli powder to taste (I use about 1/2 teaspoon)
- Salt to taste
- 2 tablespoons chopped cilantro (coriander leaves)
- 1 tablespoon lemon juice
- 2 tablespoons of oil for cooking the filling
For frying:
- Oil for deep frying
That’s it! No weird ingredients, no shopping at speciality stores. Just regular stuff. The first time I made these after Mrs Gupta’s lesson, I realised I already had everything in my pantry except the peas, which I grabbed from the corner shop in two minutes.
Making the dough
Okay, this is where I used to mess up BIG time. I’d make the dough too soft, too hard, or forget to rest it. Let me save you from my mistakes!
In a large bowl, mix your flour, carom seeds (if using), and salt together. Add the oil or melted ghee. Now here’s the important part: rub the oil into the flour with your fingertips for about 3-4 minutes. It should look like breadcrumbs when you’re done. Mrs Gupta made me do this step three times before she was satisfied. “This is what makes samosa veg crispy and flaky!” she’d say.
To test if you’ve rubbed it enough, take a small amount in your palm and squeeze it. If it holds together in a lump, you’re good. If it crumbles and falls apart, keep rubbing!
Now add water little by little. You don’t want a soft dough as you’d make for roti. You want it stiff! Think firm playdough consistency. I use about 1/2 cup of water, but it depends on your flour. Add it gradually, mix with a spoon first, then bring it together with your hands.
Knead it just until it comes together. Don’t over-knead! I used to knead for like ten minutes, thinking more was better. Wrong! Over-kneading makes tough samosas. Just 30 seconds to a minute is enough.
Cover the dough with a damp cloth and let it rest for at least 20 minutes. This is crucial! I used to skip this step when I was in a hurry. Bad idea. The resting time makes the dough easier to roll and gives you flakier samosas. Use this time to make your filling!

The samosa filling
This is the fun part! The filling is where all the flavour happens, and honestly, it’s pretty hard to mess up. Boil your potatoes until they’re tender but not mushy. I usually boil them with the skin on (saves time peeling!), then peel them once they’re cool enough to handle. Mash them roughly. You don’t want baby food consistency; just break them up with a fork or potato masher. Some chunks are totally fine!
Heat 2 tablespoons of oil in a pan over medium heat. Add the cumin seeds and let them sizzle for about 10 seconds. The smell is amazing! Add the peas and cook for about 2 minutes. Now add all your spices: turmeric, garam masala, coriander powder, red chilli powder, and salt. Stir for about 30 seconds. Your kitchen will smell like an Indian restaurant at this point. My roommate always comes running when I hit this stag, asking what I’m cooking!
Add the mashed potatoes to the pan. Mix everything together really well. Cook for about 2-3 minutes, mashing the potatoes a bit more as you mix. You want the filling to hold together, not be too dry or too wet.
Turn off the heat and add the lemon juice and chopped cilantro. Mix well and let it cool down completely before using. Hot filling will make your dough soggy and impossible to seal. I learned this the hard way when my first batch fell apart in the oil!
Taste the filling now (this is my favourite part!). Adjust the salt and spice if needed. Some people like it spicier, some milder. Make it your own!
How to make veg samosa?
Alright, this is where it all comes together. The shaping part used to intimidate me so much! But Mrs Gupta showed me a simple method that works every time.
Shaping: Divide your rested dough into 6 equal balls. Take one ball and roll it into a circle about 6-7 inches across. It doesn’t have to be perfect! Mine are usually more oval than circular and they still work fine.
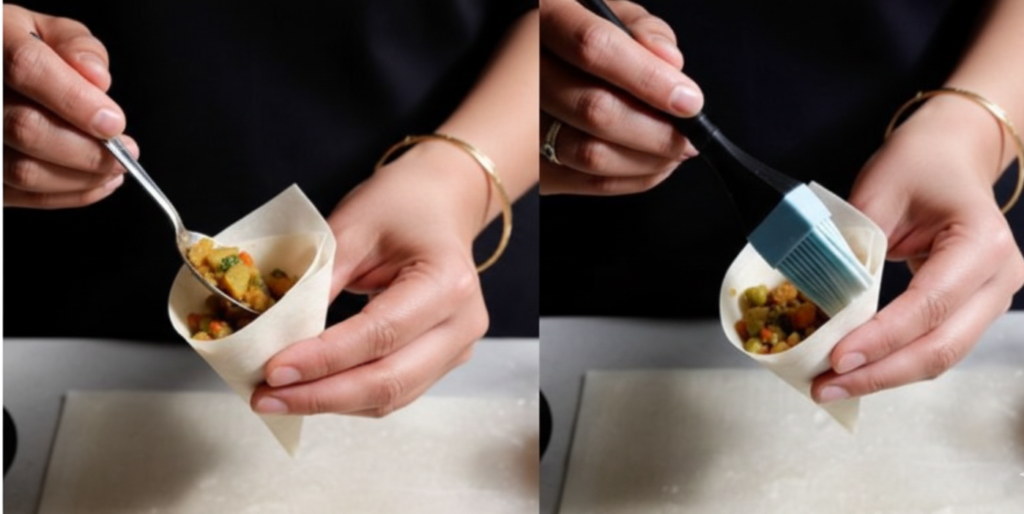
Cut the circle in half. You now have two semicircles. Each semicircle will become one samosa! Take one semicircle and apply a tiny bit of water along the straight edge. Fold it into a cone shape, overlapping the edges to seal. Make sure the pointy end is properly closed or your filling will leak out. Press firmly to seal. Hold the cone in your hand and fill it with about 1-2 tablespoons of the potato filling. Don’t overfill! I used to stuff them too much, and they’d burst. Leave some space at the top.
Apply water to the inside edges of the opening. Press firmly to seal, making a triangular shape. Make sure it’s completely sealed! Any gaps and you’ll have oil seeping into your samosa while frying. Repeat with the remaining dough. Place the shaped samosas on a plate and cover them with a damp cloth so they don’t dry out.
Frying: This is the moment of truth! Heat oil in a deep pan or kadai. The oil should be about 2-3 inches deep. Test the temperature by dropping a small piece of dough into it. If it sizzles and comes up slowly, your oil is ready. If it browns too quickly, your oil is too hot!
Fry samosas on medium to low heat. High heat will brown them outside but leave them raw inside. Low and slow is the way! Carefully slide 3-4 samosas into the oil (don’t overcrowd the pan). Fry them for about 4-5 minutes on each side until they’re golden brown and crispy. Keep turning them gently so they brown evenly.
Remove with a slotted spoon and drain on paper towels. Let them sit for a couple of minutes before eating. I know it’s hard to wait (the smell is incredible!), but biting into a just-fried samosa will burn your mouth. Trust me on this!
What to serve with samosas?
Samosas are pretty versatile! The classic way is with mint chutney and tamarind chutney. Honestly, samosas without chutney feel incomplete to me! You can buy these at Indian stores or make a quick mint chutney by blending fresh mint leaves, cilantro, green chili, lemon juice, salt, and water. Takes 5 minutes!
Sometimes I just dip them in tomato ketchup (don’t judge me!). My Indian friends give me looks, but it tastes good! For a full meal, serve them as samosa chaat with chickpea curry poured over the top, plus yogurt, chutneys, and chopped onions. Or enjoy them the way Mrs. Gupta does: hot samosas with a cup of chai on a rainy afternoon. Perfect!
I usually make them for parties, and they disappear so fast! Last time I made 30 samosas for 10 people. Gone in 20 minutes!

Is this vegetable samosa recipe vegan?
Great question! The filling is definitely vegan since it’s just potatoes, peas and spices. The dough can easily be vegan too!
I make the dough with oil instead of ghee and it works perfectly. Just use any neutral vegetable oil. The samosas are still crispy and flaky! My vegan friend Sarah loves these and she was so happy to find out she could eat them without any modifications.
When frying, obviously, you’re using oil, so that’s vegan. The only thing to watch out for is if you’re serving them with chutneys. Some store-bought chutneys might have dairy, so check the labels! Mrs Gupta actually told me that traditionally, many families in India make samosas completely vegan anyway, especially during certain religious fasting periods. So this recipe for veg samosa has been vegan-friendly for generations!
Can you freeze a samosa?
Yes! I can make a huge batch and freeze it for later.
Before frying: Shape all your samosas, place them on a tray lined with parchment paper (make sure they’re not touching) and freeze for about 2 hours until solid. Then transfer them to a freezer bag. They’ll keep for about 2-3 months.
When you want to eat them, no need to thaw! Just fry them straight from the freezer. They’ll take a bit longer to cook (about 7-8 minutes instead of 5), but they turn out perfect!
After frying: You can also freeze cooked samosas. Let them cool completely, then freeze in a single layer before transferring to a bag. Reheat them in the oven at 180°C (350°F) for about 10-15 minutes until crispy again.
I usually make a double batch now and freeze half. It’s so convenient when unexpected guests show up, or when I’m craving samosas but don’t want to go through the whole process. Just fry and eat!
How many calories are in a veg samosa?
Alright, let’s talk numbers. One veg samosa from this recipe has approximately 150-180 calories, depending on how much oil it absorbs during frying.
The veg samosa calories break down roughly like this:
- The dough and filling together (before frying): about 80-100 calories
- The oil absorbed during frying: about 50-80 calories
So if you eat two samosas, which let’s be real, you probably will because they’re addictive, that’s about 300-360 calories.
Now, if you’re watching calories, here are some options:
- Bake them instead: Brush with a little oil and bake at 180°C (350°F) for about 20-25 minutes. They won’t be quite as crispy as fried ones but they’ll save you about 50-60 calories per samosa.
- Air-fry them: If you have an air fryer, brush them with oil and air fry at 180°C (350°F) for about 12-15 minutes. Similar calorie savings to baking!
- Make smaller ones: Mini samosas mean you can eat more pieces with fewer total calories. Plus, they’re cute!
Honestly, though, I don’t stress too much about how many calories are in a veg samosa. I make them as a treat not an everyday food. Everything in moderation, right?
Craving to try veg samosa nearby?
Look, I totally get it. Some days you just want to eat samosas without making them yourself! I order them sometimes when I’m tired or lazy (which is often, not gonna lie). If you’re craving samosas and don’t feel like cooking and you are in london visit Dilchad or try their takeaway service. Most Indian restaurants have veg samosa on their menu and they’re usually pretty affordable.
But here’s the thing I’ve learned: homemade samosas are SO much better than most restaurant ones. You control the spice level, the filling is fresher, and you know exactly what’s going into them. Plus, your house smells amazing while you’re making them! The first few times might take you longer than 30 minutes while you’re getting the hang of it. But once you’ve made them a couple of times, you’ll speed up. Now I can make them while chatting with friends or watching TV. It’s become second nature!
And honestly? There’s something really satisfying about serving homemade samosas to people. When they bite into one and their eyes light up, asking, “You made these?!” It’s the best feeling ever.
Check out the Menu here.
Final Thoughts
Making veg samosa at home might seem scary at first (trust me, I was terrified!), but once you get the hang of it, it’s actually pretty simple and fun! The dough comes together in minutes, the filling is easy and the shaping gets easier with practice.
My biggest tip? Don’t aim for perfection on your first try. My first samosas looked ridiculous! But they still tasted good and that’s what matters. Each batch you make will be better than the last.
So grab your potatoes, get that dough ready, and give this samosa veg recipe a try. Start with a small batch if you’re nervous. Even if they’re not perfect, I promise they’ll be delicious. And hey, if mine turned out okay after that disastrous first attempt, yours definitely will too!
Happy cooking, and enjoy your crispy, delicious homemade samosas!
FAQ
Why did my samosas break while frying?
This happened to me SO many times! Usually, it’s because the dough is too soft, you didn’t seal the edges properly, or the oil is too hot. Make sure your dough is stiff, seal all the edges well with water, and fry on medium-low heat. Also, make sure your filling is completely cool before stuffing!
Can I use whole wheat flour instead of all-purpose flour?
You can use half whole wheat and half all-purpose flour. Using 100% whole wheat makes the samosas a bit harder and less flaky. The 50-50 mix gives you a healthier option that still tastes good!
My samosa dough is too hard to roll. What did I do wrong?
You probably didn’t add enough water or didn’t knead it enough. If this happens, sprinkle a little water on the dough, knead it a bit more, and let it rest for another 10 minutes. It should soften up!
Can I bake samosas instead of frying them?
Yes! Brush them with oil and bake at 180°C/350°F for about 20-25 minutes until golden. They won’t be as crispy as fried ones, but they’re still delicious and much healthier!
How do I store leftover samosas?
Store them in an airtight container in the fridge for up to 3 days. Reheat in the oven at 180°C/350°F for about 10 minutes to crisp them up again. Don’t microwave them, or they’ll get soggy!